
Gardening is more than a hobby or a passion—it’s a way to connect with yourself, nature + embrace the diversity of life.
Plants have always held such a special place in my heart and soul. It’s a truly incredible experience to plant a seed in the cold, hard ground and watch it silently grow into its full potential. It reminds me that the seeds I plant today, I will be harvesting later. It reminds me to always be intentional and do my very best—because all beautiful things grow out of moments of darkness.
Although my indoor spaces are already filled with plant bebes, I reached out to a good friend of mine (who just so happens to be a successful gardener) to find out what it takes to create a true garden from the ground up—indoors or outdoors.
And without further ado…
Meet our sister + gardening queen ~ Kim Mangan!
When Hannah asked if I could write a gardening blog post this year, I felt a little disheartened along with my excitement… How could I give advice when my own garden currently feels like a failure? Yes, my tomatoes and herbs are fine—but what about my three trays of seedlings lost to fungus gnats and white mold from being inside too long? My full tray of first-try onion seeds that got neglected, dried out, and tipped over in on windy day? My huge pot full of propagated figs branches that flooded, and my carrot bed that’s still full of carrots sown last September that are too tough to eat? This current situation has changed a lot of things about my day to day life, including allowing me to work from home and baby my plants, and yet so many things were still left totally to fate….
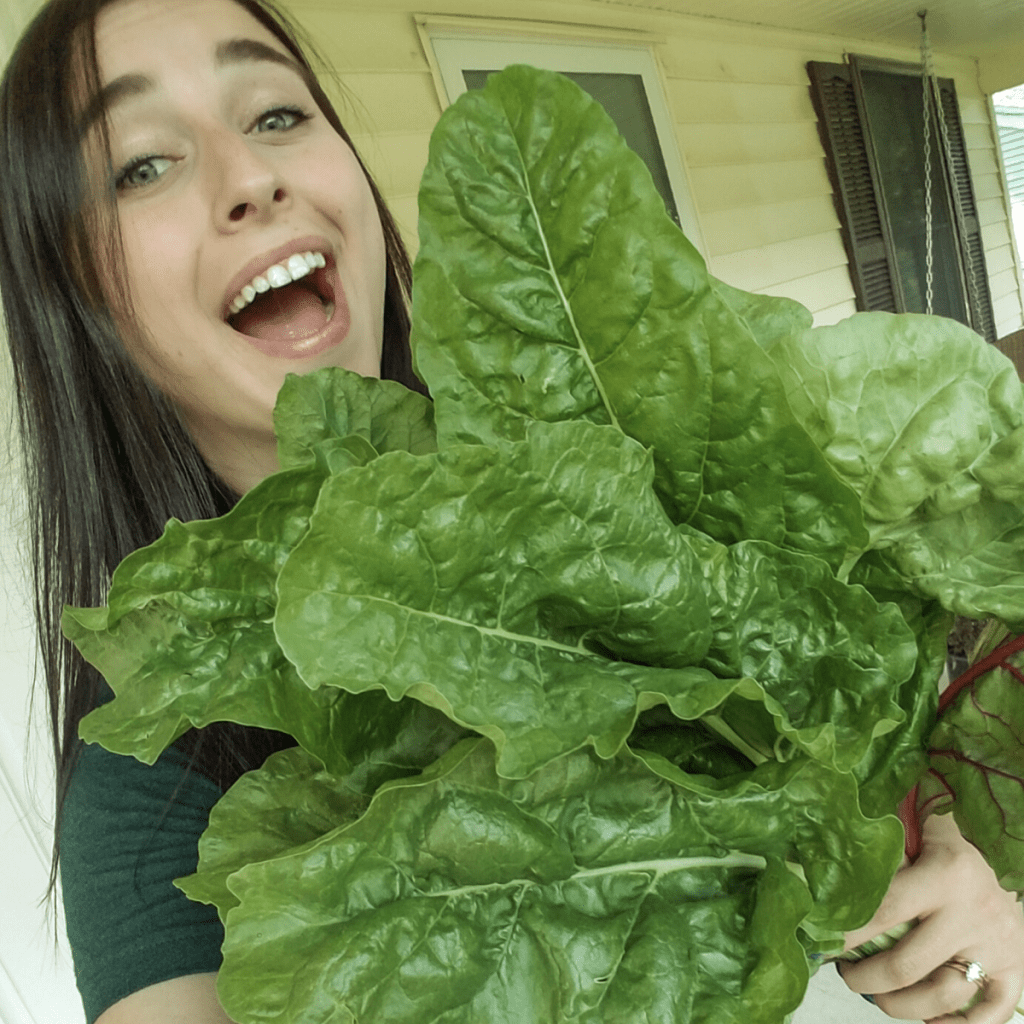
Gardening is one of the most fulfilling hobbies I’ve ever tried. I’ve been doing it for five years now, and I’m nowhere close to being an expert—but even as an amateur, there’s nothing more satisfying than coming inside at the end of the day, covered in sweat with dirt under your nails, and biting into a ripe tomato that you grew yourself!
Starting a garden can be intimidating, but when you realize you can scale to whatever size/location/plants you choose, it becomes much easier. You’re free to be as creative as you want, and even people with only windows or tiny apartment balconies can grow some sort of garden with a little ingenuity.
It’s super hard to speak generally about gardening when there are so many factors for every step, but I’ve tried to break this down as best as I can.

STEP 1: Figure out what you want to grow + find your hardiness zone.
Are you growing a whole yard-garden filled with all kinds of veggies, or just a few pots with herbs for your kitchen? Deciding what you want to grow is one of my favorite parts of gardening—not to mention it includes shopping! I have a pretty good-sized yard, so I went full veggie garden (I’m actually pretty terrible at growing flowers, so I won’t give any advice on that.)
An important factor if you’re planning to plant outdoors is finding your plant hardiness zone. These zones serve as a guideline for when/what you can plant according to when your area sees its first frost in the fall and last frost in the early spring. Good resources for this info, as well as growing info specific to your location is the USDA’s website or the Farmer’s Almanac. The general advice is to start seeds indoors 6-8 weeks prior to the last predicted frost in your area, so that your plant babies will be strong enough to move outside when it’s warm enough. Some seeds to like to be direct-sown into the ground once the weather is nice outside instead of started inside and transplanted, so be sure to read up on your particular seed choice.
If you’re growing indoors only, think of how much light you get from the window your plants will be near, and supplement with lamps/LED grow lights if needed. Indoor growing is another endless option with tons of science and specialty equipment attached, but you can grow herbs on a windowsill with little to no effort as well.
Step 2: Get your materials and plant away!
Once you decide what you’re growing, you need to decide how you’re growing—from seed or from starts? Of the hundreds of Instagram homesteaders and gardeners I follow, I’ve never heard any of them bash buying plants that have already been started for you. It’s a huge time-saver and when you’re just starting out it can be the best option, especially if you’re starting late in the season. I would recommend looking at plant starters in a local farmer’s market/stand or private gardening center over a big box store for these, and organic is always your best bet.
Since I’m anal-retentive and like to be in control (know your strength,) I start my plants from seed. It’s very fun and extremely gratifying to see tiny seedlings spring up because YOU planted them! This method is great if you have room around the house/adequate light to have seeds trays around for the last few weeks of winter, and if you’re lucky enough to have a greenhouse or poly tunnel at your disposal (I’m jealous—it’s fantastic.)
Seed-starting medium is always a question, but generally you want to use soil that is lighter or mixed as a “seed-starting” mix, as most seeds do best in fluffy soil that can hold moisture but doesn’t get weighed down. Most seeds starting blends have peat, vermiculite or perlite mixed with compost or garden soil. I would stress going for quality here—if you get defective or buggy starter, you aren’t doing yourself any favors. Organic is the way to go!
Once you find your medium, it’s time to plant! You can use plant-able trays made of biodegradable material that go straight into the ground with your plants when it’s time, or plastic seed trays that the seedlings will be popped out of. I tend to start seeds in small plastic 4-inch pots, so that I don’t need to plant my babies up out of a tray (I tend to accidentally kill tiny them this way.) And yes, I said plastic, but I haven’t purchased any new pots since we started our gardening over five years back! If you wash/store them properly and take care of them, you can reuse the pots and seed trays for years and years.
I like to put all my seed-starting soil in a large bin and pre-moisten it with water (as it tends to compress/shrink once it’s wet,) and then fill my trays/pots inside the bin. Since I usually do this in winter, it’s nice to sit inside on my floor and not make a huge mess! Follow the planting directions on each packet of seeds to determine how deep to plant your seeds—I mark a chopstick with a ruler and use this as a dibber. Cover your seeds as needed and water gently.
If you’re using grow lights or heat mats, make sure to be watchful of them! Heat mats should be used during the day only to mimic the ground warming/cooling with the sun. Grow lights should be set no more than a few inches above sprouted seeds and moved up as they grow, or else your seedlings will get “leggy,” or grow tall and spindly, to try and reach the lights. If you’re using window light only, make sure you turn your pot/trays every so often so that the seedlings don’t grow in only one direction towards the light.
Step 3: Watch them grow!
I usually keep my trays covered with their matching plastic covers until the seeds germinate and sprout—this helps contain moisture and make a nice cozy environment. I’ve seen people use old recycled plastic clamshell containers and zip/grocery bags for this too! Once they sprout, you can take the covers off, but make sure they stay moist. If you don’t get very good air circulation, I would recommend using a small fan in the area to prevent mold/mildew and fungus gnats (pure evil). If you see mold, remove the first inch or two of soil and replace it to prevent the spread. If you have your little pots or seed cells in larger trays, try watering your plants by pouring water into the tray from below—the seedlings take what they need and leave the rest, allowing you to pour out the excess water if needed.
This is the best time to sit back and watch your plant babies grow and change. Every day you’ll be able to see progress and new leaves emerging!
Step 4: Planting out (or up!)
After your last frosts have passed and the outdoors temperatures look stable, it’s time to plant out your plant toddlers—gently removing the plants from their trays and small pots into their permanent garden homes. For soil in our garden, we use a bulk mix of topsoil and compost, and supplement with our own homemade compost or organic bagged compost each year as needed.
We have raised beds and practice no-till, so our soil settles quite a bit year over year. No-till gardening is avoiding excess digging/turning of the soil and leaving the old plant root systems be so as not to disturb the soil ecosystem that occurs under the plants! We have tons of worms, beneficial bugs, and no weeds because of this.
When planting out, dig a hole as wide and deep as your seed cell or pot, tip the baby plant out gently, and place it into the hole. Cover with soil and gently press down around the plant to ensure it has a sturdy base to stand tall! This goes for planting into larger pots as well. There are many plants (tomatoes and peppers especially) that like to buried deeper into the dirt and will grow higher roots when this happens. We always plant our pepper and tomato plants up past the first set of leaves.
Water your plants, and enjoy the fruits and veggies of your labor!
Step 5: Maintenance a.k.a. Constant Vigilance!
I could go on and on forever about pests, animals, diseases, and environmental problems your plant babies will encounter once they’re out in the great big wild, but the biggest thing that makes a successful garden is vigilance. Check under leaves for aphids and caterpillars, keep an eye out for discoloration and wilting, water all of your plants enough, but don’t overwater. The whole process is a delicate and personal balancing act. Some days I just sit back and enjoy watching my plants sway in the breeze, and others I’m covered in cabbage moth caterpillars, pulling up kale that looks like swiss cheese—but the more you watch and learn from your garden, the easier maintaining it gets!
Last tip, utilize all of the resources you can find! Social media has been a huge factor in the success of my gardens- watching and learning from other people’s mistakes and choosing what’s best for your situation is so easy with so many examples and experts at your fingertips. Find and follow your favorite gardeners and homesteaders, and don’t be afraid to ask questions! The online gardening community has some of the nicest and most open people ever. Also, find friends and family to start a garden journey with; the shared experiences are helpful in and of themselves.
Sometimes there will be full-on garden fails, but if you learn from them, you’ll never be a failure of a gardener! I’ll never balance my tray of onions on my grill again, I’ll make sure my pots have drainage holes before letting them sit out in a rain storm, and I’ll make sure my eight million indoor baby tomato plants have enough air circulation next year- but even if I don’t, I’ll still garden regardless, and I hope you do, too!
Photography ~ Kim Mangan
Follow Kim on Instagram for more garden tips + tricks!